2026 Best Soldering Iron Why Is My Solder Not Melting?

Time:2026-10-25 Author:Sophia
0%

A soldering iron can be hot and still fail to melt solder. That contradiction frustrates beginners and experienced makers alike. In this 2026 guide, we examine why is my soldering iron not melting the solder through practical testing, not guesswork. We will inspect tip temperature, oxidation, solder type, power delivery, and contact technique. A dull, blackened tip often transfers heat poorly, even when the handle feels extremely hot.

Electronics author Charles Platt captures the practical truth: “Soldering is easy, but it takes practice.” His observation matters here. Good joints depend on heat transfer, clean surfaces, suitable flux, and steady timing. The solder should melt against the heated workpiece, not merely on the iron tip. Watch the joint closely. A shiny surface, gentle smoke from flux, and smooth solder flow provide useful clues. Still, troubleshooting is not always neat. A new iron may have an inaccurate temperature display, while a cheap cable may limit heating power. I have also seen users blame the solder when the real problem was a loose tip. That mistake is easy to make.

This guide compares common causes and sensible fixes for modern soldering stations. It also explains when replacing the tip, changing solder diameter, or increasing heat is appropriate. Safety remains essential. Use ventilation, eye protection, and heat-resistant supports. Small details matter. The right diagnosis saves time, components, and unnecessary frustration.
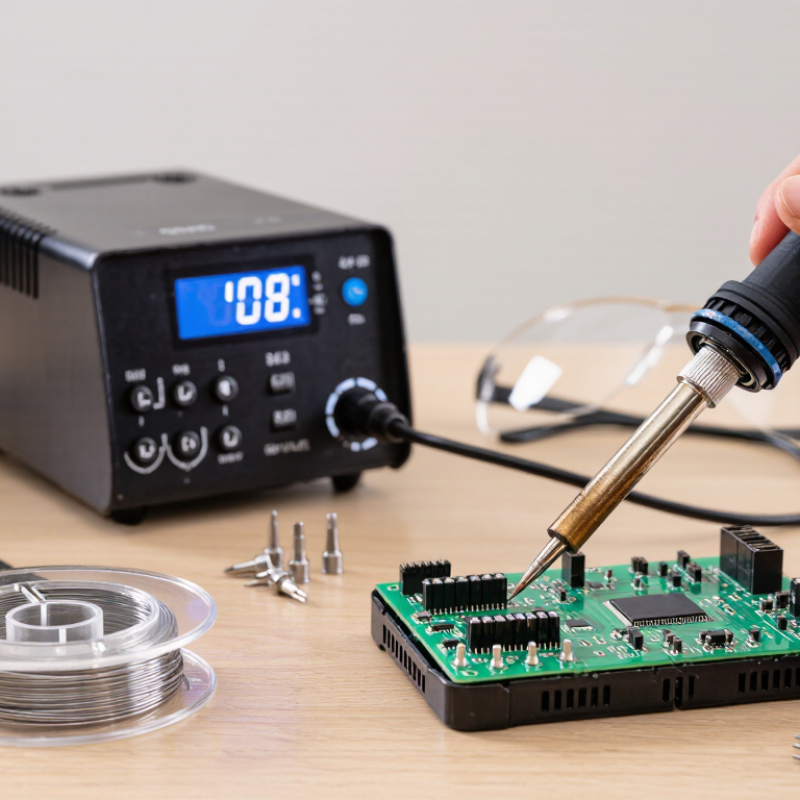
2026 Best Soldering Iron Why Is My Solder Not Melting?

What a Soldering Iron Does and How Heat Transfer Works

A soldering iron is a controlled heat source, not a melting tool by itself. Its heater converts electrical energy into thermal energy. That heat travels through the metal tip and into the joint. Heat needs contact. If the tip barely touches the surface, energy escapes into the air instead.

When solder will not melt, check the tip before increasing temperature. A dark, oxidized tip transfers heat poorly. Clean it gently, then apply a thin layer of fresh solder. A shiny surface matters. The joint may also be too large for the iron, especially with thick copper wire or a broad metal connector. These parts act like heat sinks and pull warmth away faster than the heater can replace it.

Solder alloy also affects the result. Lead-free solder commonly needs more heat than older formulations, so follow its stated working range. In my own bench work, I have sometimes blamed the iron when the real problem was a cold, dirty joint. Hold the tinned tip against both surfaces, then feed solder into the heated joint, not directly onto the tip. The solder should flow smoothly around the connection. If it forms a dull ball, stop and inspect the contact, tip condition, and temperature setting. Higher heat is not always better; excessive heat can damage insulation, lift circuit pads, or oxidize the tip quickly.

2026 Best Soldering Iron: Why Is My Solder Not Melting? — What a Soldering Iron Does and How Heat Transfer Works
Topic What It Means Typical Real-World Values or Conditions Recommended Action
Main function of a soldering iron It transfers thermal energy through a heated tip to the solder and the joint. The tip must be hotter than the solder’s melting range and must deliver enough heat to the work area. Heat both the pad and the component lead before feeding solder into the joint.
Lead-free solder melting range Common lead-free electronic solders melt at a higher temperature than traditional tin-lead solder. Many tin-silver-copper alloys melt at approximately 217–227 °C (423–441 °F). Set the iron commonly around 350–400 °C (662–752 °F), then adjust for joint size and thermal mass.
Tin-lead solder melting range The widely used eutectic tin-lead alloy melts at a lower temperature than most lead-free alloys. A 63/37 tin-lead alloy melts at approximately 183 °C (361 °F). Use only where permitted and follow applicable safety, ventilation, and disposal requirements.
Tip temperature versus joint temperature The displayed iron setting is not necessarily the actual temperature at the joint. Large copper areas, ground planes, connectors, and thick wires can rapidly draw heat away. Use a clean, properly tinned tip and allow sufficient contact time for the joint to reach soldering temperature.
Conduction Conduction transfers heat through direct contact between the tip, pad, lead, and solder. A larger contact area generally transfers heat more effectively than a sharp, oxidized point. Choose a tip shape that matches the joint and lightly tin it to improve thermal contact.
Thermal mass Thermal mass is the amount of heat a tip can store and release before its temperature drops significantly. A very fine tip may cool quickly on a large ground plane or thick wire. Use a larger tip or a soldering iron with sufficient power and temperature recovery for high-mass joints.
Oxidized or dirty tip Oxidation prevents solder from wetting the tip and reduces the effective heat-transfer area. The tip may appear dull, dark, or uneven, and solder may form a ball instead of a smooth coating. Clean the tip with brass wool or a damp sponge, apply flux, and immediately re-tin the working surface.
Insufficient flux Flux removes surface oxides and helps molten solder spread across clean metal. Oxidized copper, old component leads, and overheated surfaces can resist wetting even when hot enough. Apply compatible electronics flux; avoid corrosive plumbing flux on electronic assemblies.
Incorrect temperature setting If the joint is below the solder’s melting range, solder will remain solid or melt only on the tip. Typical starting settings are about 320–350 °C for tin-lead solder and 350–400 °C for many lead-free solders. Increase temperature gradually while minimizing dwell time to reduce component and board damage.
Poor mechanical contact Touching only the solder or only one side of the joint does not heat the complete connection efficiently. Solder may melt on the tip but remain solid where the pad and lead meet. Place the tip so it contacts both the pad and the lead, then feed solder to the heated joint.
Solder wire problem Wrong alloy, excessive oxidation, or depleted flux can make solder difficult to melt or spread. Electronic solder is commonly supplied with a flux core; the alloy composition determines its melting range. Check the alloy and flux-core specification, keep the spool dry and clean, and use fresh solder when necessary.
Power and recovery Power affects how quickly the iron replaces heat lost to the joint; it does not alone determine maximum tip temperature. A high-thermal-mass joint can cause a low-power iron to cool noticeably during soldering. Select an iron with appropriate power, stable temperature control, and fast thermal recovery for the work.
Safety and quality check Molten solder and hot tools can cause burns, fumes, and damage to electronic parts. A good joint is typically smooth, well-wetted, and forms a reliable connection without excessive solder. Use ventilation, eye protection, a stable stand, heat-resistant work practices, and inspect the joint after cooling.

How to Check Solder, Tip Condition, and Temperature Settings

When solder refuses to melt, check the solder before blaming the iron. Fresh solder should have a clean, bright surface and melt smoothly on a properly heated tip. Oxidized solder may look dull, feel stiff, or form separate beads. Cut off the damaged end and test a short piece. Check it closely.

Tip condition often causes the problem. A dry, blackened tip transfers heat poorly, even when the handle feels hot. Wipe the tip gently on a damp sponge or brass wool, then apply a thin layer of solder. The coating should appear shiny, not bulky. Avoid filing the tip, because this can remove its protective surface. I have damaged tips by cleaning too aggressively, so a light touch matters.

Temperature settings also need practical testing. Begin near the solder manufacturer’s recommended range, then adjust gradually. Lead-free solder commonly needs more heat than traditional solder, but excessive heat can burn flux and damage small pads. Touch the solder to the joint, not directly to the tip. A good joint heats the pad and component lead together. Solder should flow across both surfaces within a few seconds. If it only melts on the tip, the joint is probably too cold, dirty, or poorly contacted. Recheck the tip, the setting, and the joint position. Small details matter.

2026 Best Soldering Iron: Why Is My Solder Not Melting?

Compare the solder melting point with a practical soldering-iron tip temperature range.

Check the solder

Lead-free alloys commonly melt around 217–227°C, while common tin-lead alloys melt around 183–190°C.

Check the tip condition

A dry, oxidized, or poorly tinned tip transfers heat inefficiently. Clean and re-tin the working surface before testing again.

Check the temperature

Typical tip settings are about 315–350°C for tin-lead solder and 350–400°C for lead-free solder.

Common Reasons Solder Will Not Melt

2026 Best Soldering Iron: Why Is My Solder Not Melting?

Common Reasons Solder Will Not Melt

When solder refuses to melt, the iron may not be the real problem. The solder itself could require a higher temperature. Lead-free alloys often melt above 215°C, while some specialized solder needs more heat. Check the alloy’s melting range before changing the iron setting. I once increased the temperature repeatedly, but the solder still formed a dull ball. The wire was simply incompatible with the joint.

A damaged or oxidized tip transfers heat poorly. A black, rough surface can prevent proper contact. Clean the tip, apply a small amount of fresh solder, and keep it lightly coated. Do not scrub aggressively; excessive abrasion can remove the protective surface. The joint may also be absorbing heat. Large copper areas, thick wires, and metal connectors cool quickly. Preheating the workpiece gently can help, but overheating nearby parts creates another risk.

Heat the joint, not only the solder wire. Place the tinned tip against both surfaces for a few seconds, then feed solder into the heated connection. If flux has evaporated or the surfaces contain oil, solder may bead instead of flowing. Clean suitable metal surfaces and use fresh flux when necessary. Ventilation matters, even during short repairs. I still occasionally rush this step and blame the tool first. A temperature display can also be inaccurate, so observing solder flow remains useful. A shiny, smooth fillet usually indicates better heat transfer than a grainy, lumpy one.

Step-by-Step Methods to Restore Proper Soldering Performance

When solder refuses to melt, the problem is usually heat transfer, not the solder itself. Set the iron near the temperature recommended for your solder type. Lead-free solder often needs more heat than traditional solder. Confirm the temperature with the iron’s display, but do not trust it completely. Calibration can drift.

Clean the tip with brass wool, then apply a thin layer of fresh solder. A dry, dark tip transfers heat poorly. Touch the tinned tip to both the pad and the component lead. Wait two or three seconds before feeding solder into the joint, not directly onto the tip. The solder should flow around the connection and form a smooth, shiny fillet. If it beads up, oxidation or surface contamination may be blocking the heat. Stop and clean the joint.

Large wires and metal connectors absorb heat quickly. Use a suitable tip with enough contact area, rather than simply increasing the temperature. Check that the cable is firmly seated and that the tip is not loose. I once blamed weak solder for a failed joint, but the real cause was a loose, oxidized tip. That mistake still influences my checks. Avoid forcing solder into a cold joint. It creates a brittle lump and hides the real fault. If the solder remains solid, inspect the solder type, tip condition, temperature setting, and contact pressure in that order. Work in a ventilated area and wash your hands after handling solder or flux.

How to Choose the Best Soldering Iron for 2026

2026 Best Soldering Iron: Why Is My Solder Not Melting?

How to Choose the Best Soldering Iron for 2026

Choosing the best soldering iron starts with the solder alloy, not the advertised wattage. NIST data lists tin-lead eutectic solder near 183°C, while common lead-free SAC alloys melt around 217–220°C. Your iron must reach the correct working temperature and recover heat quickly. IPC J-STD-001 also emphasizes controlled heating, clean surfaces, and reliable solder joints. A cheap iron may display 350°C, yet its worn tip can lose heat against a large copper pad.

For 2026, look for adjustable temperature control, stable thermal recovery, replaceable tips, and clear temperature feedback. A narrow tip suits small circuit pads, but it struggles on connectors and ground planes. A wider chisel tip transfers heat more effectively. I still sometimes blame the solder first. That assumption can be wrong. Oxidation, low power, or insufficient flux may be the real problem. Never force solder onto a cold joint; heat the joint, then feed solder to the heated metal.

Tips: Clean the tip with brass wool, apply a small amount of fresh solder, and check the temperature with a calibrated external thermometer. If lead-free solder refuses to flow, raise the setting gradually within the alloy’s recommended range. Keep the joint still for several seconds. Inspect the result under magnification. A dull, cracked, or grainy surface deserves another inspection, not confidence.

FAQS

What does a soldering iron actually do?

It converts electrical energy into heat. The metal tip transfers that heat into a joint through contact.

Why will solder form a dull ball instead of flowing?

The joint may be cold, dirty, or poorly contacted. Heat both surfaces, not only the solder wire.

How can I improve heat transfer from the tip?

Clean the tip gently and add a thin layer of fresh solder. A shiny tip transfers heat more effectively.

What does an oxidized soldering tip look like?

It may appear black, rough, or dull. Do not scrub aggressively; excessive abrasion can damage its surface.

Why do thick wires and copper areas cool so quickly?

They act like heat sinks. Large metal parts absorb heat faster than the iron can replace it.

Should I increase the temperature when solder will not melt?

Check the solder alloy first. Some lead-free solder needs temperatures above 215°C, but excessive heat can cause damage.

How should I solder a joint correctly?

Press the tinned tip against both surfaces for a few seconds. Feed solder into the heated joint, not onto the tip.

What else can prevent solder from flowing?

Oil, evaporated flux, and poor surface contact can cause beading. Clean suitable metal surfaces and use fresh flux when needed.

Can a temperature display always be trusted?

Not completely. Displays can be inaccurate, so watch the solder flow and inspect the finished joint.

What does a good solder joint look like?

It usually appears smooth and shiny, with solder flowing around the connection. A grainy lump suggests weak heat transfer. I sometimes rush this inspection.

Conclusion

A soldering iron transfers heat from its electrically heated element through the tip and into the solder and workpiece. When solder does not melt, the problem may involve insufficient temperature, poor heat transfer, an oxidized or damaged tip, unsuitable solder, or a joint that is absorbing heat too quickly. Understanding these factors helps answer the common question, “why is my soldering iron not melting the solder?”

This guide explains how to inspect solder condition, clean and tin the tip, verify temperature settings, and improve contact with the joint. It also provides step-by-step methods for restoring reliable performance, including checking the power supply, removing oxidation, using the correct tip size, and allowing enough heating time. Finally, it outlines how to choose the best soldering iron for 2026 by considering adjustable temperature control, stable heat output, suitable tip options, comfortable handling, and dependable safety features.

Sophia

Sophia

Sophia is a dedicated marketing professional with an exceptional depth of knowledge about her company's products and services. With a keen understanding of market trends and customer needs, she crafts insightful blog posts that not only inform but also engage readers, enriching the company’s online......