Clogged drip irrigation emitters rarely fail without warning. A steady stream becomes a weak trickle, then stops. In a vegetable bed, one dry circle may appear beside healthy plants. By 2026, growers still need practical cleaning methods, not flashy promises. This guide explores what is the best way to clear clogged drip irrigation emitters in real working conditions. It considers water quality, emitter design, line pressure, and tubing age. These details matter. A method that works with sandy well water may fail against algae or mineral scale. Field experience often reveals a simple mistake: growers flush the lines repeatedly while ignoring a blocked filter. That wastes time and water. Sometimes, the emitter is damaged rather than clogged.
Reliable maintenance begins with diagnosis. Check the filter, flush the mainline, inspect pressure, and compare flow from several emitters. Use clean water first. It is safer. Gentle flushing may remove loose sediment, while manufacturer-approved cleaning solutions can address biological growth or scale. However, chemical treatment requires correct dosage and compatible materials. Guesswork can damage tubing and harm nearby plants. Professional irrigation guidance and the emitter manufacturer’s instructions should direct every decision. No single method wins every time. A stubborn blockage may justify replacing the emitter instead of forcing it open. That choice feels inconvenient, but it can restore uniform watering quickly. This overview compares the leading approaches, explains where each one fits, and highlights overlooked habits that keep small passages clear. Even experienced growers can miss one detail: clean water does not guarantee clean irrigation lines.
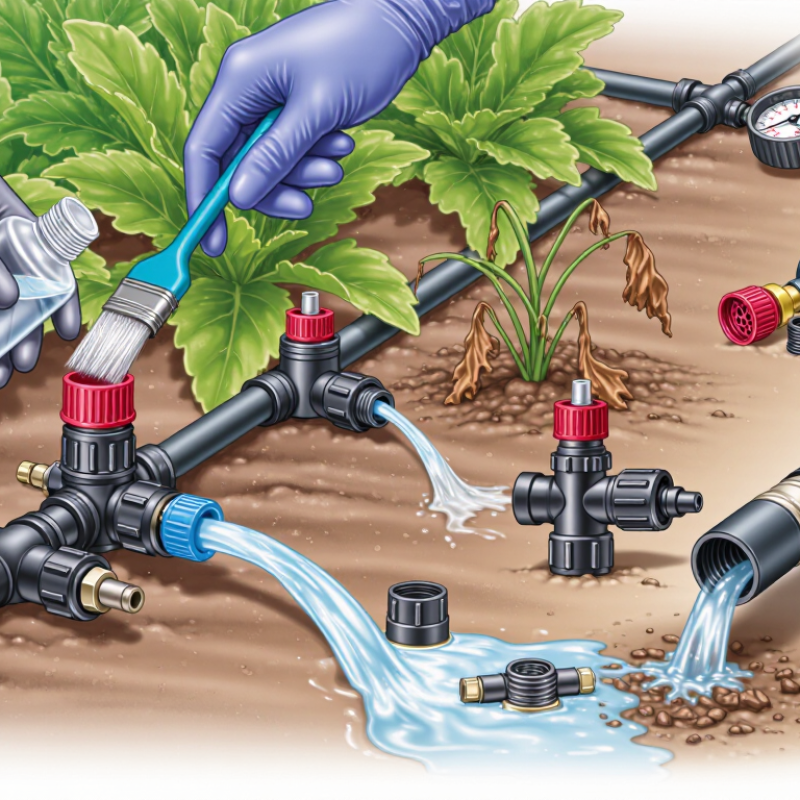
Before clearing an emitter, identify why water flow declined. A weak outlet does not always mean a blocked emitter. I check the filter, line pressure, and nearby outlets. Then I inspect the emitter opening and surrounding soil. Look for sediment. Fine sand often causes gradual flow loss. Mineral scale appears as pale, hard crusts. Organic slime feels soft and slippery.
The blockage may be partial or complete. A partial clog leaves a thin, uneven stream. A severe clog produces only a drip or no water. I remove one emitter and test water flow from the exposed tube. If water flows strongly, the emitter is likely responsible. If flow remains weak, the problem may be upstream. This small test prevents unnecessary cleaning. I have sometimes skipped it and wasted time. That mistake is avoidable.
For light sediment, flush the irrigation line with clean water. Remove end caps and let water run until it looks clear. For mineral deposits, soak removable parts in a suitable descaling solution. Follow the product instructions carefully. For organic material, use gentle brushing and thorough rinsing. Never force a wire through a narrow passage. It can damage the flow path and create uneven irrigation. After cleaning, reinstall the emitter and measure output again. Record the result. Not every clogged emitter can be restored, especially after long exposure to scale.
Before clearing clogged drip irrigation emitters in 2026, shut off the water supply completely. Open the nearest flush valve to release trapped pressure. A pressurized line can spray grit into your eyes. Wear safety glasses, waterproof gloves, and shoes with firm soles. Do not work near exposed electrical connections or slippery soil.
Prepare a clean bucket, soft brush, fine pin, adjustable wrench, and fresh water. Keep a small towel nearby for wet fittings. Use the emitter manufacturer’s service guidance when available. Needle-like tools can enlarge outlet openings and change the application rate.
I once used excessive force on a stubborn outlet, and the emitter never delivered evenly again. Patience matters here.
Inspect the filter, pressure regulator, tubing, and end caps before removing individual emitters. Photograph the layout if several parts look similar. Remove only a few emitters at a time, then place them in labeled sections of the bucket. Rinse loose soil away before brushing. Never blow through an emitter with your mouth. Compressed air may also damage delicate parts or propel debris. A mild cleaning solution can help with mineral deposits, but test it on one removable part first. Some deposits resist simple rinsing, and replacement may be safer than aggressive cleaning. Recheck every connection before restoring water pressure slowly.
Flushing drip lines is one of the most practical ways to remove loose sediment, algae, and pipe debris before they reach emitters. Open the line ends or designated flush valves, then run clean water until the discharge becomes visibly clear. The USDA NRCS National Engineering Handbook, Part 652, identifies regular flushing as essential for maintaining irrigation performance. Its guidance commonly references flushing velocities near 1 foot per second for transporting settled material. Slow water may look active, but it can leave grit behind.
Flush the mainline first, then the submain and lateral lines. This sequence prevents upstream debris from entering sections already cleaned. Watch the water in a clear container. Brown particles, cloudy water, or tiny flakes indicate that flushing should continue. The Irrigation Association’s drip irrigation guidance also stresses periodic line flushing, especially where source water contains suspended solids. In practical checks, a two-minute flush may be enough for a short lateral, while longer runs need more time.
Do not assume clear water guarantees clean emitters. Sediment can remain trapped in low points or folded tubing. That assumption deserves review. Open each section fully, but avoid excessive pressure that can damage fittings. Record the flushing date and water condition. Small records help reveal recurring problems. Maybe the schedule is too optimistic. A monthly routine may fail during dusty construction, algae growth, or sudden source-water changes.
In 2026, clearing clogged drip irrigation emitters still begins with diagnosis, not replacement. FAO Irrigation and Drainage Paper 56 reports that well-managed drip systems can reach 90–95% application efficiency. A blocked outlet quickly undermines that advantage. Check uneven wetting, reduced flow, and pressure changes along the line. Measure one emitter for 30 minutes, then compare it with a clean emitter nearby. Small differences matter.
Clean first. Remove the emitter and flush the tubing with clean water. Use a soft brush or plastic pick around the outlet, never a metal needle. Soak mineral deposits in a mild, irrigation-safe acidic solution, following the product instructions and local water regulations. A visible white crust usually signals mineral scaling. Dark slime may indicate biological growth. Do not mix cleaning chemicals.
Replace the emitter when flushing and soaking fail, or when its flow remains inconsistent. USDA Natural Resources Conservation Service irrigation guidance emphasizes filtration, pressure control, and regular flow monitoring. Those measures prevent repeated blockages better than endless cleaning. In field work, I have replaced emitters too quickly. That wastes parts and hides poor filtration. Yet soaking every emitter is not wise either. Brittle plastic, damaged outlets, and swollen seals rarely recover. Inspect the filter, flush the mainline, and record flow before installing a replacement. My judgment is still imperfect, especially where water chemistry changes seasonally.
2026 Top Ways to Clear Clogged Drip Irrigation Emitters
Clogged drip emitters often reveal a filtration problem, not just dirty tubing. I start by turning off the water and removing each blocked emitter carefully. Soak removable parts in clean water, then flush the lateral lines at full pressure. Never push wire through tiny outlets. It can enlarge the opening and create uneven watering. Some emitters may still fail after cleaning, which is easy to overlook.
Prevent Future Clogs with Filtration and Regular Maintenance
Install a suitable filter before water enters the drip system. Select the filter according to your water source and emitter requirements. Screen filters suit many systems, while disc filters can trap finer particles. Check pressure before and after the filter. A noticeable difference usually signals a dirty filter. Clean it before flow becomes weak. Flush the mainline and lateral lines regularly, especially after repairs or dusty weather. Inspect emitters near the end of each row, where sediment often collects.
Tips: Keep spare emitters nearby. Mark slow-flow areas with small flags. Clean filters weekly during heavy use. Check cloudy water after flushing. Do not assume clear water is particle-free. Organic growth can still develop inside warm, shaded pipes. I once delayed maintenance because several plants looked healthy. Later, hidden clogs caused dry patches that were difficult to correct. A simple inspection schedule would have prevented that mistake.
How to use this chart: Smaller filtration openings capture finer particles before they reach drip emitters. A 120-mesh filter is approximately 125 µm, while 200 mesh is approximately 75 µm. Select filtration according to the emitter manufacturer’s requirements and the water source.
To clear existing clogs, flush the mainline and laterals, clean or replace filter elements, and inspect emitters for sediment or biological growth. Regular pressure checks, filter cleaning, and scheduled line flushing help prevent future blockages. Chemical treatment should only be used after identifying the clog type and confirming material compatibility.
Check the filter, line pressure, nearby outlets, and emitter opening. A thin, uneven stream suggests a partial clog. No flow suggests a severe blockage. Do not guess too quickly.
Fine sand can reduce flow gradually. Mineral scale leaves pale, hard crusts. Organic buildup feels soft and slippery. Each material needs different cleaning.
Remove one emitter and test the exposed tube. Strong water flow points to the emitter. Weak flow suggests a filter, pressure, or line problem. This small test saves time.
Flush the line with clean water. Open the end caps or flush valves. Continue until the discharge looks clear. Brown particles mean more flushing is needed.
Flush the mainline first. Then flush submain and lateral sections. This prevents upstream debris from entering cleaned tubing. The order matters.
A flushing speed near one foot per second can transport settled material. Slow water may appear active but leave grit behind. Check the discharge in a clear container.
Soak removable parts in a suitable descaling solution. Follow its instructions carefully. Use gentle brushing for soft organic material. Rinse every part thoroughly. Never force wire through the passage.
Reinstall the emitter and measure its output again. Compare it with nearby outlets. Record the result and flushing date. Not every emitter recovers after long scale exposure. That is easy to overlook.
Clogged drip irrigation emitters can reduce water flow, create dry spots, and stress plants. Start by identifying the cause and severity of the blockage, such as sediment, algae, mineral buildup, or physical damage. Turn off the water supply, release pressure, and prepare clean tools and protective equipment before working on the system. Then open the line ends and flush the drip tubing to push out loose debris. Asking “what is the best way to clear clogged drip irrigation emitters” depends on the condition of each emitter: gently rinse minor blockages, soak removable emitters in clean water or an appropriate cleaning solution for mineral deposits, and replace units that remain blocked or damaged.
To prevent future problems, install suitable filtration, check pressure regularly, and flush the lines on a routine schedule. Inspect emitters for uneven flow, clean filters as needed, and keep storage and maintenance areas free from dirt. Consistent care helps maintain uniform irrigation and extends the useful life of the system.

Pargo Tool