Choosing the right drill bit for concrete in 2026 is not a minor hardware decision. It affects drilling speed, hole accuracy, tool life, and worker safety. Global cement production reached roughly 4.1 billion metric tons in 2023, according to the U.S. Geological Survey’s Mineral Commodity Summaries 2024. That scale reflects continued demand for concrete construction, renovation, and infrastructure work. It also means more users must understand how materials and bit designs interact.
The practical question is how to choose the correct drill bit for concrete when surfaces vary. A small wall anchor may need a carbide-tipped masonry bit. Reinforced concrete may require a rotary hammer and an SDS-Plus or SDS-Max bit. Dense aggregate can create strong vibration, heat, and slower penetration. On real projects, a bit that works well in soft block may struggle against granite aggregate or steel reinforcement. I have seen users blame the drill first. Sometimes, the bit was simply wrong.
Safety data makes the choice more important. OSHA sets an eight-hour respirable crystalline silica permissible exposure limit of 50 micrograms per cubic meter. Its construction standard also requires exposure-control measures, including water delivery or dust collection in applicable tasks. NIOSH identifies respirable crystalline silica as a serious occupational hazard. Therefore, this guide considers more than cutting speed. It examines carbide quality, diamond technology, shank compatibility, drilling mode, cooling, and dust control. Some recommendations remain situation-dependent. Manufacturer claims are useful, but field testing, concrete condition, and operator judgment still matter. The best bit is not always the most expensive one.
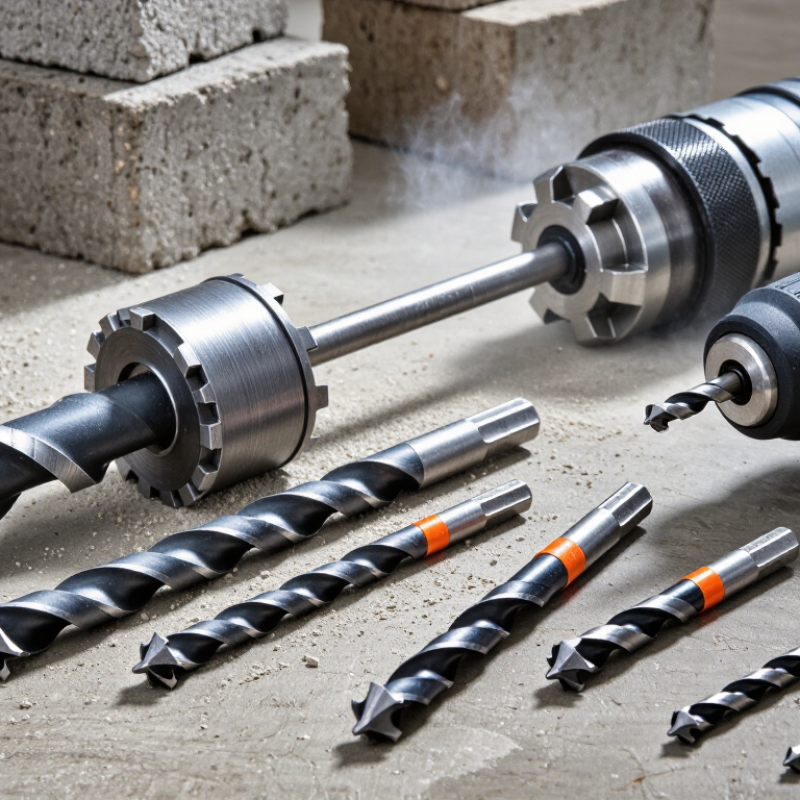
Concrete is not one uniform material, so the right drill bit depends on its age, density, and aggregate. Fresh concrete can feel softer, while fully cured concrete may resist the first contact sharply. Lightweight concrete usually drills faster than dense structural concrete. Hard stone aggregate can dull a cutting edge quickly.
For small holes in ordinary concrete, choose a carbide-tipped masonry bit with a diameter matching the anchor. A hammer-action bit is useful for repeated impact and moderate depths. For reinforced concrete, drilling becomes more demanding because steel bars may interrupt the hole. A bit designed for reinforced concrete is safer and more reliable than forcing a basic masonry bit. Stop if the tool strikes metal, then check the hole location before continuing.
Hole size and depth must match the fixing requirement, not just the available bit. Dust-packed holes reduce anchor grip, especially in dry, brittle concrete. I usually clear dust with a suitable brush and controlled air, while protecting my eyes and lungs. Water can reduce dust, but it may be unsuitable near electrical systems or sensitive surfaces. Keep the drill aligned; a leaning hole can weaken the fixing. Short pauses also help control heat. I have learned that speed is not always progress. Sometimes, slowing down prevents a damaged bit, an oversized hole, or a loose anchor. Always inspect the concrete for cracks before drilling.
| Concrete Type | Typical Characteristics | Recommended Bit Type | Suitable Drilling Mode | Common Diameter Range | Speed and Technique Guidance | Key Selection Considerations |
|---|---|---|---|---|---|---|
| Standard Structural Concrete | Ordinary Portland-cement concrete with a balanced mix of cement paste, sand, coarse aggregate, and water. Usually contains natural or crushed stone aggregate. | Carbide-tipped masonry bit for small holes; SDS-style carbide bit for repeated or larger holes. | Rotary hammer mode is generally most efficient. Hammer drilling is suitable for masonry bits and carbide-tipped hammer bits. | Approximately 4–25 mm for common anchors and fasteners. | Use moderate pressure and let the carbide tip cut. Withdraw the bit periodically to clear dust and reduce heat buildup. | Match the bit diameter to the anchor manufacturer’s specified hole size. Expect slower progress when the bit meets coarse aggregate. |
| Reinforced Concrete | Concrete containing steel reinforcing bars, welded wire reinforcement, or other embedded metal components. | Heavy-duty carbide rotary-hammer bit for concrete; use a reinforcing-bar-capable bit or a separate metal-cutting procedure when steel is encountered. | Rotary hammer mode for concrete. Stop hammering if the bit contacts reinforcement and follow the project’s structural and safety requirements. | Approximately 6–32 mm for general anchoring and service installations. | Use steady pressure without forcing the bit. If drilling progress stops abruptly, do not increase force; verify whether reinforcement, conduit, or piping is present. | Scan the drilling area before drilling. Avoid cutting reinforcement unless an engineer or responsible authority approves it. |
| High-Strength Concrete | Concrete designed with higher compressive strength than ordinary structural concrete; it may contain hard, dense aggregate and a low water-to-cement ratio. | Premium carbide rotary-hammer bit for small and medium holes; diamond core bit for larger penetrations or demanding work. | Rotary hammer for anchor holes; diamond drilling for precise, deep, or large-diameter openings. | Approximately 6–40 mm for anchors; larger sizes generally require core drilling equipment. | Use controlled feed pressure, adequate cooling where specified, and frequent dust removal. Avoid excessive impact force, which can damage the hole or tool. | Choose a bit rated for the concrete strength and aggregate hardness. Hole cleanliness is especially important for bonded anchors. |
| Lightweight Aggregate Concrete | Uses lightweight aggregates such as expanded clay, shale, or slate. It is generally less dense and can be more brittle or friable than normal-weight concrete. | Sharp carbide-tipped masonry bit; a lower-impact rotary-hammer setting may be appropriate for larger holes. | Rotary mode for small holes; controlled hammer drilling for larger holes when permitted by the material and application. | Approximately 4–20 mm for fixtures and light-duty anchors. | Use light-to-moderate pressure and avoid aggressive impact. Start slowly to prevent breakout around the entry and exit points. | Select anchors specifically rated for lightweight or cellular substrates. The substrate may not provide the same holding capacity as dense concrete. |
| Precast Concrete | Factory-produced concrete elements with controlled dimensions and curing conditions. Density and aggregate hardness vary by product. | Carbide-tipped masonry bit for routine holes; diamond bit for clean, accurate, or larger penetrations. | Rotary hammer for general fastening; diamond drilling when low vibration, accuracy, or a clean edge is required. | Approximately 4–50 mm for common installations, depending on the element and application. | Support the component properly and use moderate feed pressure. Reduce pressure near the breakthrough point to limit spalling. | Check for prestressing strands, reinforcement, lifting hardware, and embedded services before drilling. |
| Prestressed Concrete | Contains tensioned steel strands or tendons that help the member carry loads efficiently. Damage to these components can compromise structural performance. | No bit should be selected before locating tendons and reinforcement. If drilling is approved, use the method specified by a qualified engineer or project authority. | Use only an approved drilling method. Hammer action may be restricted because of vibration and the risk of damaging embedded tendons. | Project-specific; hole size and location must be approved before drilling. | Scan thoroughly and maintain required clearances. Stop immediately if metal, unusual resistance, or unexpected voids are encountered. | Never drill based only on surface appearance or drawings that may not reflect field conditions. Structural approval is essential. |
| Old, Weathered, or Cracked Concrete | May contain weakened zones, surface scaling, hidden cracks, corrosion-related damage, or loose aggregate near the drilling location. | Sharp carbide masonry bit for sound areas; diamond drilling may reduce breakout for larger or more precise holes. | Rotary mode or low-impact hammer drilling, depending on substrate condition and hole size. | Approximately 4–25 mm for light and medium-duty fastening. | Use low-to-moderate pressure, begin at low speed, and keep the bit aligned. Avoid drilling close to visible cracks or damaged edges. | Assess the concrete before drilling. A suitable anchor for cracked concrete may be required, and damaged concrete may need repair first. |
| Wet or Water-Saturated Concrete | Concrete with moisture in pores or cracks, including recently placed, underground, or water-exposed concrete. | Carbide bit for ordinary holes; diamond bit for wet core drilling where water management is permitted. | Rotary hammer for small holes; wet diamond drilling for larger holes and reduced dust generation. | Approximately 6–100 mm or more, depending on the equipment and application. | Use electrical tools only with appropriate protection and job-site controls. Manage slurry, prevent water from entering sensitive areas, and follow curing requirements. | Do not drill newly placed concrete until the required strength and curing conditions have been reached. Water can affect dust control, visibility, and anchor installation. |
| Concrete with Hard Coarse Aggregate | Contains dense aggregate such as granite, basalt, or other hard stone that can significantly slow drilling and increase bit wear. | High-quality carbide rotary-hammer bit; diamond bit for frequent drilling, deep holes, or larger diameters. | Rotary hammer for small and medium holes; diamond core drilling for large or precision openings. | Approximately 6–40 mm for anchors; larger sizes typically require core drilling. | Keep the bit aligned and apply consistent pressure. Allow the cutting edges to work instead of forcing the tool through the aggregate. | Prioritize carbide quality, flute design, dust removal, and the tool’s impact energy. Expect higher wear than in softer aggregate concrete. |
| Concrete with Surface Coatings or Finishes | May include paint, epoxy, waterproofing, tile, render, or other layers that can interfere with accurate starting and hole cleaning. | Carbide-tipped bit suitable for the underlying concrete; use a separate tile or coating-penetration method where necessary. | Begin in rotary mode to penetrate fragile finishes, then use the approved hammer setting after reaching sound concrete. | Approximately 4–25 mm for common fixings. | Mark the location clearly, start slowly, and reduce pressure near the finish to prevent chipping. Clean the hole thoroughly before installing an anchor. | Confirm that the coating or finish is compatible with the planned anchor. The hole diameter must be measured in the structural substrate, not only in the surface layer. |
Fresh concrete may feel softer than cured concrete. Dense concrete and hard stone aggregate can slow drilling and wear bits faster.
Use a carbide-tipped masonry bit that matches the anchor diameter. Fluted designs help clear dust.
A reinforced-concrete bit or SDS-style rotary hammer bit can handle impact better. Stop if you hit metal and reassess the hole location.
Match it to the anchor instructions, not just the screw. A 6 mm bit suits many light-duty anchors; heavier fixtures may need 8–12 mm holes.
Mark the planned depth with tape. Make sure the bit’s working length extends several millimeters beyond it.
Dust can weaken anchor grip, especially in dry, brittle concrete. Clear the hole with a suitable brush and controlled air.
Keep the drill aligned, use a stable stance, and pause to manage heat. Protect your eyes and lungs from dust.
Replace it if drilling becomes unusually slow or produces excess heat and vibration. A worn tip may leave a hole that looks fine but holds poorly.
No. Slower pressure can prevent overheating, wandering, and oversized holes. Speed is not always progress.
Choosing the right drill bit for concrete starts with understanding the material and the task. Concrete can vary in hardness, aggregate, and reinforcement, so consider what you are drilling into and the hole’s required depth and diameter. Match the bit material to the concrete’s hardness, then select a design suited to the job: masonry bits work for lighter tasks, while tougher concrete may require a more durable bit with a suitable cutting tip. The correct diameter should fit the anchor or fastener without making the hole unnecessarily large.
To learn how to choose the correct drill bit for concrete, also consider the drill and its operating mode. A hammer drill or rotary hammer can make work in hard concrete more efficient when paired with a compatible bit. Drill steadily, use appropriate protective equipment, and follow the tool and bit instructions. Keep the bit aligned, avoid excessive pressure, and pause when needed to manage heat and clear dust. Careful selection and technique help create accurate holes while reducing wear and improving safety.

 Pargo Tool