A workshop built for welders, compressors, table saws, or industrial drills needs more than extra outlets. It needs a deliberate electrical plan. This introduction to how to safely wire a workshop for heavy power tools examines load calculations, circuit separation, grounding, protection, and practical installation checks.
Mike Holt, a respected electrical educator and code-training expert, often states, “Electricity is not forgiving.” That warning matters when a compressor starts, a saw blade binds, or several motors run together. A dimming light may signal voltage drop. A warm receptacle may reveal an overloaded connection. Small clues deserve attention.
The safest approach begins with identifying each tool’s voltage, amperage, starting current, and duty cycle. Motors can demand much more current during startup. Therefore, one shared circuit may fail even when the nameplate ratings seem acceptable. Dedicated circuits, correctly sized conductors, suitable breakers, and reliable grounding create a stronger foundation. Ground-fault and arc-fault protection may also apply, depending on the workshop location and local requirements.
Real workshops are rarely perfect. Old wiring, dusty enclosures, crowded panels, and improvised extension cords can complicate the plan. I have seen tidy installations hide weak terminations, so appearance alone proves little. Every connection should be accessible, firmly tightened, and inspected by a qualified electrician. Local electrical codes must control the final design, especially in China, where requirements can differ by building and application. Safety should remain practical, testable, and honest.
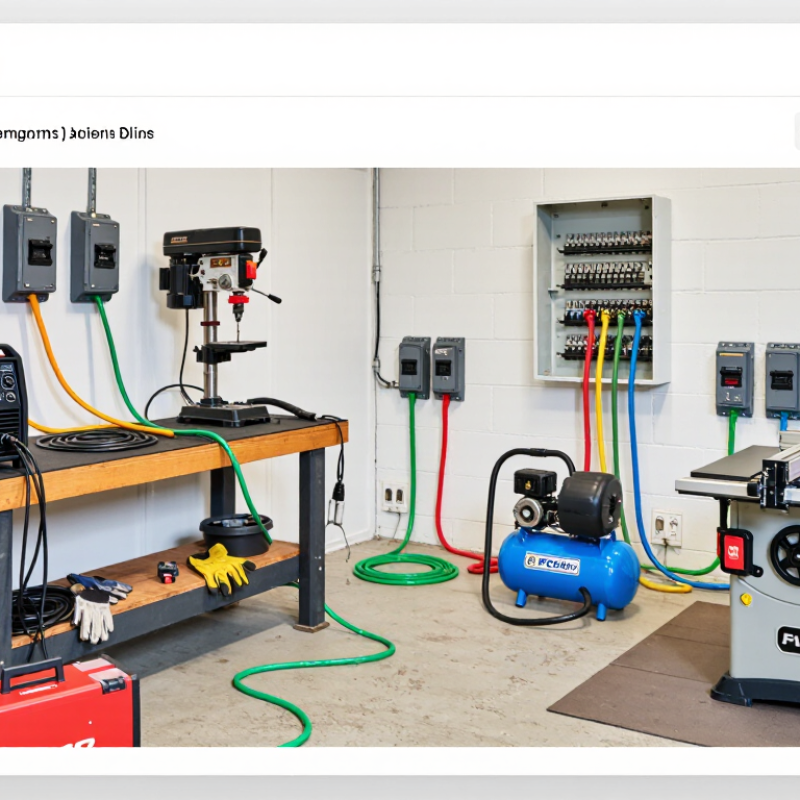
Assessing Electrical Loads for Heavy Workshop Tools
Heavy tools need more than a breaker-size guess. Record each tool’s voltage, rated current, phase, duty cycle, and motor starting demand. A 3-kilowatt heater at 230 volts draws about 13 amps during operation. A motor may draw several times its running current when starting. The 2023 National Electrical Code, NFPA 70, generally requires continuous loads to be calculated at 125 percent. Motor circuits also require conductor sizing based on applicable full-load current tables.
Add the expected simultaneous loads, not only the largest machine. Include lighting, extraction fans, compressors, chargers, and heating equipment. The U.S. Department of Energy reports that motor-driven systems consume about 68 percent of industrial electricity, showing why motor efficiency and starting behavior matter. In a small workshop, a 230-volt circuit can still suffer voltage drop when a compressor starts beside a dust collector.
A spreadsheet can still lie.
Check the service rating, panel capacity, feeder length, and available fault current with a qualified electrician. OSHA’s Electrical Safety-Related Work Practices standard emphasizes properly maintained equipment and protection from energized hazards. The Electrical Safety Foundation International recorded 126 workplace electrical fatalities in 2021, based on Bureau of Labor Statistics data. That figure is not a design formula, but it deserves attention. My own weak point would be trusting nameplate current alone; measured startup behavior and actual working patterns can reveal a very different load.
| Tool or Equipment | Typical Supply | Representative Input Current | Approximate Running Load | Starting or Special Load Consideration | Recommended Planning Approach | Safety Check |
|---|---|---|---|---|---|---|
| Representative Heavy-Tool Load Assessment | ||||||
| Portable table saw | 120 V, single-phase | 12 A | 1,440 VA | Motor startup can briefly exceed running current. | Use a dedicated 120 V, 15 A circuit when the tool is rated near 12 A and no other significant load is expected. | Provide grounding and overload protection. |
| Large shop vacuum | 120 V, single-phase | 15 A | 1,800 VA | High inrush current may trip a marginal circuit during startup. | Use a dedicated circuit if the vacuum is operated with a saw, sander, or other motor load. | Avoid extension cords that are undersized or excessively long. |
| Bench grinder | 120 V, single-phase | 8 A | 960 VA | Short motor-starting surge is normal. | A 15 A branch circuit is generally suitable when the nameplate current and local code permit. | Use a guarded switch and properly rated receptacle. |
| Portable air compressor | 120 V, single-phase | 15 A | 1,800 VA | Compressor motors can draw several times their running current while starting. | Prefer a dedicated circuit; verify that the circuit can support the motor-starting requirement. | Do not increase breaker size without confirming conductor and equipment ratings. |
| Dust collector | 240 V, single-phase | 13 A | 3,120 VA | Fan motors may have significant starting current. | Plan a dedicated 240 V circuit sized from the nameplate and applicable motor rules. | Install disconnecting means where required by local regulations. |
| Stationary air compressor | 240 V, single-phase | 22 A | 5,280 VA | Starting current and pressure-restart performance are critical design factors. | Use a dedicated circuit; verify motor protection, conductor ampacity, and voltage at the motor terminals. | A qualified electrician should verify the motor branch-circuit design. |
| Metal-cutting band saw | 240 V, single-phase | 10 A | 2,400 VA | Motor startup and cutting load vary with material thickness. | Provide a dedicated circuit when the tool is permanently installed or used frequently. | Confirm emergency-stop and disconnect requirements. |
| Arc-welding equipment | 240 V, single-phase | 30 A maximum input | 7,200 VA maximum input | Actual demand depends on welding current, duty cycle, and the equipment rating. | Use the manufacturer’s input-current and duty-cycle data rather than estimating from output amperage. | Provide suitable overcurrent protection, grounding, ventilation, and clearance. |
| Electric space heater | 240 V, single-phase | 20 A | 4,800 VA | Heating loads are generally continuous when operated for extended periods. | Account for continuous-load requirements and avoid sharing the circuit with motor-driven tools. | Apply the local code requirement for continuous loads. |
| Basic Load Calculation Examples | ||||||
| Single-phase apparent power | 120 V or 240 V supply | VA = Volts × Amperes | Example: 240 V × 22 A = 5,280 VA. | Use nameplate current whenever it is available. | Recheck the result against the equipment documentation. | |
| Combined 120 V tool load | 120 V, single-phase | 12 A + 8 A | 2,400 VA | Two motors may start at the same time and create a temporary voltage drop. | Use separate circuits where practical, especially for a saw and dust-collection system. | Do not rely only on the sum of running currents for motor circuits. |
| Combined 240 V workshop load | 240 V, single-phase | 13 A + 10 A | 5,520 VA | Simultaneous starting of the dust collector and band saw can increase peak demand. | Check the service capacity, feeder rating, breaker coordination, and voltage drop. | Use a qualified electrical design review for multiple stationary tools. |
| Installation and Verification Checklist | ||||||
| Equipment nameplate review | Voltage, phase, frequency, full-load current, and minimum circuit rating | Record the highest rated input requirement for each tool. | Base circuit selection on the nameplate and applicable electrical code. | Required before purchasing breakers or conductors. | ||
| Service and feeder capacity | Main service rating and available spare capacity | Include lighting, heating, compressors, welders, and other simultaneous loads. | Perform a demand assessment rather than adding only the largest tool currents. | A panel with spare spaces does not necessarily have spare capacity. | ||
| Conductor and overcurrent protection | Conductor ampacity must match the installation conditions. | Breaker rating does not by itself determine conductor size. | Consider ambient temperature, conduit fill, cable length, and local code requirements. | Never solve nuisance tripping by installing a larger breaker without engineering review. | ||
| Ground-fault protection | Use the type and location required by local regulations. | Workshops may contain conductive floors, moisture, dust, and metal enclosures. | Test protective devices regularly and keep receptacles accessible. | Protection must not be bypassed or defeated. | ||
| Voltage-drop verification | Measure voltage at the tool while starting and operating. | Long runs and high motor currents can reduce available voltage. | Use appropriately sized conductors and minimize unnecessary extension-cord length. | Persistent dimming, overheating, or tripping requires inspection. | ||
| The current and load figures above are representative planning values, not universal ratings. Actual requirements vary by tool design, motor efficiency, duty cycle, supply system, conductor length, installation method, and local electrical code. Always follow the equipment nameplate and have final workshop wiring inspected or approved by a qualified electrician. | ||||||
Start with the total load, not the tool label. A 3 kW grinder may draw over 13 amps at 230 volts. Several machines can overload one circuit quickly.
Give welders, compressors, dust extractors, and heaters separate circuits. Motor starting current can exceed normal running current. Plan for both.
Match cable capacity with the breaker, installation method, ambient heat, and cable length. Check voltage drop too. A larger cable alone cannot fix an unsafe design.
Use a correctly rated breaker for overload and short-circuit protection. Add residual-current protection near damp floors or metal benches. Ground metal enclosures reliably.
Switch off the supply before inspecting panels, sockets, and cable jackets. Check polarity, grounding continuity, insulation resistance, and circuit loading. Do not trust appearance alone.
Watch for warm outlets, buzzing sounds, loose terminals, and darkened insulation. A warm terminal deserves immediate attention. Thermal scanning can expose hidden overloads.
Use the test button regularly and record the trip result and date. Keep the log beside the distribution panel. Records are easy to neglect.
Recheck circuit loading after installing a compressor, welder, or dust collector. Never reset a tripped breaker repeatedly. Find the cause first, even when the schedule feels excessive.
Wiring a workshop for heavy power tools begins with assessing the electrical load of each machine, including its voltage, amperage, starting current, and expected duty cycle. The wiring plan should use dedicated circuits where necessary, correctly sized cables, suitable breakers or fuses, and protective devices such as residual-current protection. Careful layout planning can reduce cable damage, prevent overloading, and keep outlets away from moisture, heat, moving parts, and areas where they may be struck.
To understand how to safely wire a workshop for heavy power tools, install a reliable grounding system, place outlets at convenient and protected locations, and provide accessible disconnect switches for major equipment. Before use, test polarity, grounding continuity, insulation condition, breaker operation, and voltage under load. Regular maintenance should include inspecting cables, plugs, outlets, and protective devices for wear or overheating. Any work involving the main electrical supply should be completed or checked by a qualified electrician in accordance with applicable local requirements.

 Pargo Tool